I decided that it was time for ball joint replacement. While I had them out I decided to put in the front torsion bar adjusters in preparation for turning the car into a Baja Bug. This is a big job. My recommendation: buy a professionally prepared front end.
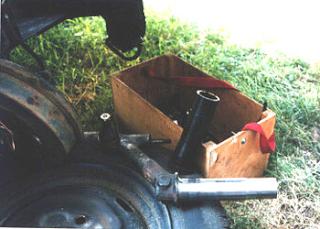
Tools: pickle fork, big wrenches (1/2 drive strongly recommended), jack, jack stands, fuel siphon, big ball peen hammer, reciprocating saw, welding outfit, socket sets, hex wrench sockets, high speed grinder with wire brush and cut off wheel, primer, paint, under coating, grease with teflon, 5 foot bar to use as a drift (driver), calipers, dremel tool (small grinder), 2 rolls paper towels, special cold chisel.
Time:
4 hours for first wheel and torsion arms removed
2 hours for second wheel and torsion arms removed
4 hours to remove torsion tubes
2 hours to cut top torsion tube
2 hours to weld adjuster into top tube
2 hours to cut bottom tube and weld adjuster
4 to 6 hours welding and brazing patches over rust on the shock towers
2 hours prepping the beam assembly for paint
1 hour to prime, paint, and undercoat beam assembly
1 hour messing with the steering box
2 hours to put beam assembly into car
3 hours to reassembly beam with torsion arms, etc.
1 hour to lower beam out of car and put on the rubber bushings on the body mounts. Do this before assembly and save an hour of cussing.
1 hour messing with the tie rod ends and steering coupler
1 hour cleaning the outside of the fuel tank, priming, painting a few spots
2 hours refitting fuel tank, including running a bead of silicon sealant, new fuel line, moving wiring grounds to better locations. My tank filler leaked on the first try, so I had fuel fumes in the car for a week. Get the filler tubes on really perfect.
After all that work, time, and energy I should have just bought a new front beam with adjusters. Well, this is a hobby and I had fun...that is to say that some aspects were fun.
My gas tank was full. Not the ideal time to start a job that requires removing the gas tank. It took me at least 45 minutes to siphon out the gas into my small gas cans.
Put the car up on sturdy jack stands. I positioned mine at the rear of the clip. This is underneath where the front of the body joins the pan. I'm not sure it's the best place, but it seemed ok.
You don't have to remove the brakes, drums, etc. Just put a block under them to keep from stretching the brake line/speedo cable. I think I sat mine on the wheels.
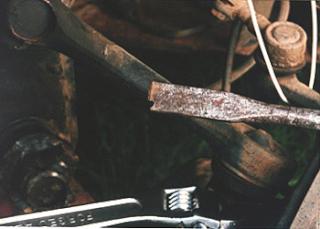
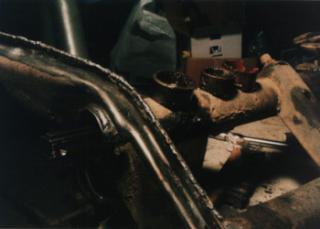
Getting the sway bar off is a real treat. Not. I used the cold chisel in this photo that has a notch in it. The clips on the sway bar clamps can be driven off frontwards. It takes a ton of pounding. If you don't care about saving the parts, save yourself the effort by using the high speed grinder and cutoff wheel. Just cut the clamp or locking wedges. Grrrr.
Incidently, this photo is the left side of the car. That white U shape thing on the right side of the photo is a piece of wire that I was going to use to hold up the wheel/brake drum.
Parts: ball joints, perhaps tie rod ends, front torsion bar adjusters, replacement fuel line, hose clamps, replacement steering coupler, some wire or light rope, urethane bushings, special grease.

Getting the ball joints out of the wheel spindle was pretty easy with a pickle fork.This photo is a bit dark, but you can see that the pickle fork is positioned to push the ball joint down and out. You hammer on the end of the pickle fork, and it is made to be pounded on pretty hard. Took me about 5 good whacks with a one pound ball peen hammer.
Remove the ball joint nut. It's still on in this photo. Same operation for upper ball joints.
I removed that weird conical adjusting nut from the upper ball joint with the pickle fork. I just rested the torsion arm on the work bench and pounded away. It only took a few whacks.
Don't remove the steering box. Just disconnect the inner tie rod ends and steering coupler.
The shop I took my torsion arms to for pressing out/in the ball joints said they had to use a torch on a couple of them. Cost: $50! (Initial estimate was $20 or $30 for labor). I'll take the car to the same shop for a 4 wheel alignment now that the spring plates are on too. I bought ball joints mail order, supposedly German made. I wish I'd known to shop around for long-travel ball joints. Apparently these are available to fit stock torsion arms. This is a different item from Thing ball joints, which I pretty sure require changing to other parts as well.
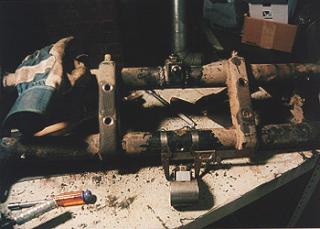
Here's the front beam on my bench. The top adjuster is already in. Note that I'm measuring the lower adjuster with a pair of calipers, and I have positioned two hose clamps around the lower beam as cutting guides. I just used my Sear's reciprocating saw (aka Saws-All) to do the cut. I was careful, and just barely nicked the host clamps. I used a high speed grinder with a cut-off wheel to get the opening just right, and to angle (camfer) the edge to get better weld penetration.
Any areas to be welded were prepped to bare metal with a wire brush on the high speed grinder.
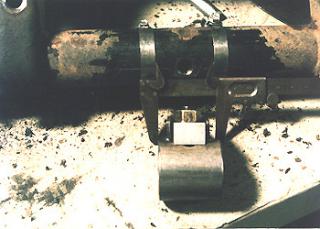
A close up of the measurement. Note that I've used the Dremel tool to cut a marking line on the lower tube where the torsion bar clamp bolt is. This mark is used to align the adjuster, so it's got to exdend on both sides of the cut, and it must be aligned with the center of the torsion bar clamping bolt. You align the adjuster's torsion clamping bolt with this line. In fact, I cut similar line on the adjuster. This was easy and accurate. Here's the principle: with the adjuster set at it's no-adjustment setting, the adjuster's torsion bar clamp must be in the same place as the original torsion bar clamp.
For raising the car, the no-adjust setting on my adjusters was down or adjusting screw out.
For lowering, the car, the no-adjust setting would be opposite, or the adjuster up, with the adjusting screw fully in.

A close up of my top adjuster installed. Note that you can still see the alignment mark on the left side of the torsion tube. My welds are ok. I practiced by continuous bead welding the shock towers. Very good practice. This was done with a $99 115V AC welder, set at about 60 amps with 5/64 welding rod. My welding on the lower adjuster is better.
A guy at a northern Virginia custom shop suggested welding an angle iron section to the back of the torsion tube before making the cut. I didn't do that. The tube ends did spring a little, but I just squeezed everything back into line with wide jaw Vise-Grips. Worked just fine. Align things, then tack weld. Remove the Vice-Grips, and finish the welds. For extra strength (i.e. racing) you would want to weld some angle iron to the back of the tube for reinforcement. You would also add gussets elsewhere. My Baja will be just mild off road, so I'm not too worried.
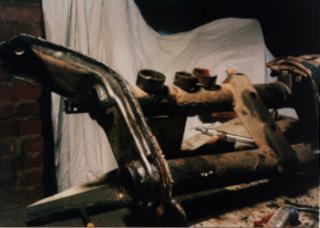
I did a funny thing. See how the lower end of the shock tower is rusted through around the lower torsion tube? I should have just thrown this front beam assembly out, and gotten a rust free assembly. However, I decided I'd mess with this one, and report later on whether or not it breaks. So...I welded and brazed patches on both sides of both ends of both shock towers. What a total pain.
On the top tube you can see (from left to right) the torsion arm bearings: roller bearing, brass bushing, composition bushing.
I used a 5 foot section of iron pipe to drive out the bearing from the opposite side. This happens after removing the center section. Next, use a flat bladed screw driver to bend/pry that brass bushing. It's got a slot. Bend it enough to push it out, then use the screw driver to chisel out the composition bushing. It goes pretty quick the third or fourth time you do it.
A close up view of my continuous welding along the seam of the shock tower. This little exercise was fun, and made a huge difference in my welding skills. All welded areas were first prepped with a wire brush on the high speed grinder.
I didn't have any trouble getting the torsion bars through the adjuster. You have to remove the adjusting bolts, and rotate the adjuster to expose the locking screw. To keep the torsion bar packs together, I just put two plastic zip wire ties on each. The wire ties hold things together, but slip along the torsion bar pack as the bar slides through the adjuster. Yep, the wire ties are still inside my torsion tubes.
Put the beam back in without the torsion arms, etc. I put in the torsion bars, but not the arms or any other junk. A partially assembled front beam is lighter and easier to assemble. I did this by myself, since all my so-called friends were doing something else besides back breaking work on greasy VW front ends. I'm kidding, but my friends were busy, so I did all this without help. The floor jack was indespensible. I balanced the assembly on it, and raised it into position. My girlfriend did so some wire brushing with the grinder (Thanks Lynn!). We cleaned up the whole thing, then I primed, painted and undercoaded the entire assembly.
When reassembling, don't forget to put the rubber bushings on the upper body supports of the beam assembly. I forgot until the very end, and had a bear of a time lowering the now completely assembled beam.
A little wiggling was all it took to get my torsion arms to go on the torsion bars. In this photo, you can see the lower torsion arm, and the black, graphite impregnated bushing from Suspension Restoration leaning on the toolbox. The bushing takes place of the outer bearing and inner brass/composition bushings. I found that in a couple of cases, I had to put the bushing in first, and slide the arm into it - as opposed to putting the bushing on the arm, and sliding them together into the torsion tube. Did I mention that I went through 2 rolls of paper towels wiping grease off all this stuff?? To the left you can see the brake/spindle assembly resting on the wheel.
Bolt everything together. Get the car aligned. I put anti-sieze on all the ball joint bolts. The upper ball joint has that big weird conical nut for alignment purposes. I haven't had the car aligned since I've been putting on spring plates too.
Suspension Restoration carries urethane bushings which they say don't squeak. I have a set installed in the front, and they are fine. No squeaking in the front. The rear Sway-A-Way bushings started squeaking (more like a grunt) after a couple of weeks. All the bushings were sprayed with grease+teflon, or things might be worse.
I've bought a little $99 Campbell-Hausfeld buzz box welder. It did a fine job, I guess. I spent more time chipping slag than welding. After that, I bought the least expensive Lincoln gas-shielded MIG welder. It is amazing and I'm still using it many years later. My recommendation: skip the stick welder and buy a gas-shielded MIG. The gas is an additional expense, but well worth it.