PIAA Bracket on R1100RT
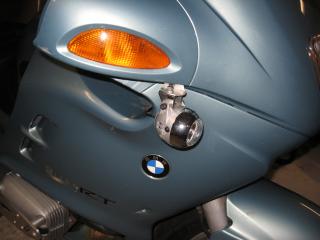
This is the final product. PIAA lights are mounted below brackets, below the mirrors. The bracket had to be very carefully crafted to fit around the design of the reverse side of the mirrors.
While this works ok, there are issues, and I suggest that you not use my exact solution. I wanted to avoid removing the dashboard or fairing. A better bracket and bracket mounting is easier to make if the dash (and/or) fairing are removed.
First off, with the dashboard off, you should be able to remove the mirror studs and use them to mount the bracket. I think that if you mount the bracket behind the studs, the mirror will be clearanced further from the fairing, but only to the thickness of the bracket. That's small and shouldn't create a problem. As far as I can tell, the "above mirror" bracket seen on other sides relies on this mounting. I think the ideal below-mirror bracket would bolt to the two lower mounting studs. It would be a simpler, stronger bracket.
Second, the wire routing I used is not idea. It was tricky to route, and the wires are pinched. Routing via the vent may be a fine idea (if the visuals don't bother you), but pinching the wires is bad. It might be possible to drill a hole in the vent pipe/duct inside the grille where it isn't visible. Run the wire through that hold (maybe even with a grommet!).
As for switching, I used the original owner's switch. He installed a weather proof switch on the dash with an LED. The PIAAs only come on with the high-beams, and only if the dash switch has also been turned on. The LED is green for no PIAAs, and red for PIAAs on.
The original mounting position was below the oil cooler. The big problem there was that every bump and driveway apron that caused the front forks to compress also smashed the front fender into the PIAA cases. Not ideal. The fender and the PIAAs are permanently marred. In retrospect, both the original owner and I are surprised that anyone recommends the 'under oil cooler' mounting position.
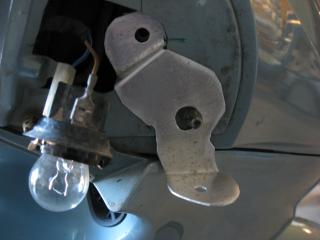
This shows the approximate position of the bracket. In this photo, the mirror is remove, and I've removed the large screw just inside the hole in the fairing. That large screw is the mounting point for the bracket.
There is a hole near the center of the bracket large enough to clear the mirror mounting stud. Ideally, the stud would be holding the bracket, but getting the studs off requires (at least) removing the dashboard.
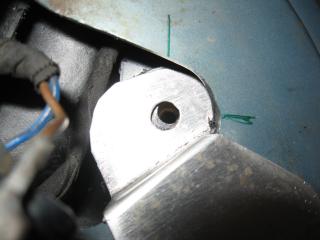
Here is the top of the bracket. The green lines are approximately the center lines of the bolt hole. The top of the bracket tucks in behind the fairing.
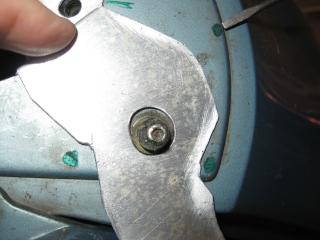
This is how the bracket is supposed to clear the mirror mount stud. I have a suspicion that the bracket moved just a little after riding the bike. Any movement would tend to pry the mirror off this stud.
The green dots are where the mirror "feet" contact the fairing. It is important to clear these feet. At the bottom, the design of the mirror has some clearance for the bracket, without the bracket having a zig-zag.
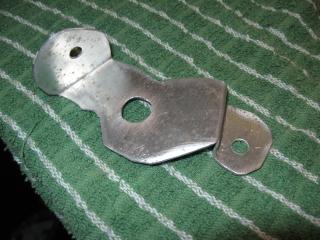
The bracket on my bench. Top of the bracket is on the right.
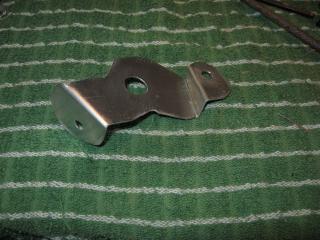
Bracket again, from the back. Bracket top is on the right. the step in the top of the bracket is more than a 90 degree bend in order to allow room for the large washer on the fairing mount bolt that holds the bracket in place.
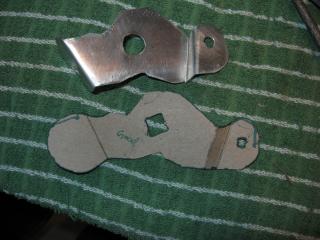
Below the bracket is the cardboard template used. I made about 10 of these templates before I got all the sizes and shapes just right.
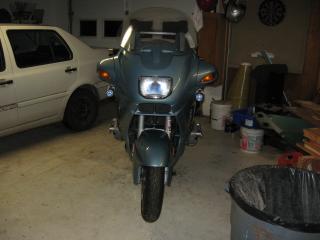
The finished product. The PIAAs are below the mirrors. They are in a fairly safe location. The are wide enough to give the "looks like car headlights" effect that some people think may enhance safety and visibility. As far as I can tell, the lights don't effect the bike driver's visual field (as lights mounted above the mirrors might).
I haven't tipped the bike onto its side to see what hits the ground first.
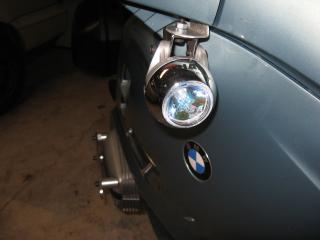
The PIAA light below the mirror. The bracket is unobtrusive. It would look better if painted (or powdercoated) black. There is just enough room to get to the allen head screws. The wires are run through the fairing vent, so I didn't have to drill any holes in the fairing.
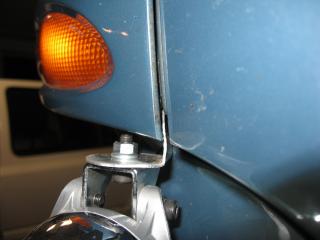
Finshed bracket closeup. There is just enough room for this thickness bracket between the mirror and fairing. This is the only mounting position possible unless the mirror mount studs are used to hold the bracket.
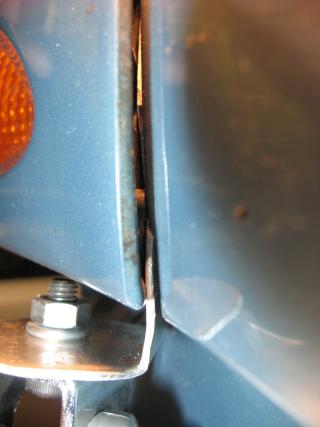
In this close up you can just make out the bracket between the mirror and fairing. You can also just see the mirror "foot". The foot is contacting the fairing, but just barely.
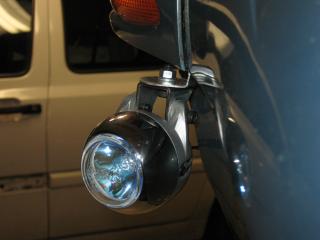
Finished mount from another angle.
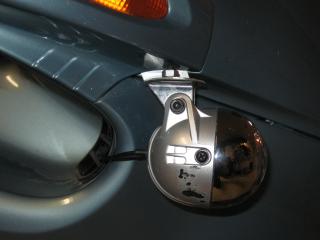
In this side view, we see the wire going into the vent. There was just enough room to push the wire outside the vent plumbing. On the left side of the bike there was a gap. On the right side, I had to pry a little to make an opening. This wire routing is somewhat unobtrusive. However, it depends on gaps in the vent. It also pinches the wire and could eventually cause a break. If you like this route in general, I suggest some modification that prevents the wire from being pinched. Perhaps it is possible to drill a hold in the vent. As I suggest above, removing the dashboard is a good idea. With the dash off you could find a better route for the wire.
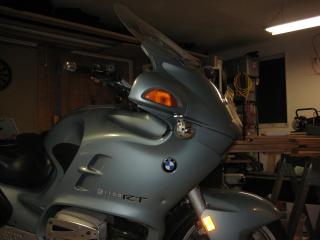
Side view of my 1999 BMW R1100RT with the PIAA lights mounted below the mirrors.
 This is the final product. PIAA lights are mounted below brackets, below the mirrors. The bracket had to be very carefully crafted to fit around the design of the reverse side of the mirrors.


