Spring plates are difficult. I've put the most recent photos first, and the whole, long sequence after these. I would not recommend Sway-A-Way adjustable spring plates for a normal Baja, especially with an IRS rear. Notching the spring plates is useful, even for an otherwise stock Baja rear. With stock spring plates, only notch 1/4 inch!
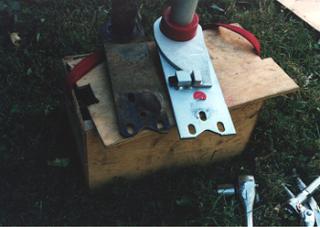
In the photo on the right, the spring plate cover is on with the long screws. The spring plate is NOT on the lower stop. At this stage, I'm getting ready to use the tool (black threaded thing on the left) to raise the spring plate.
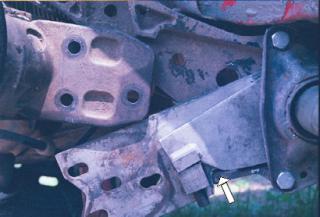
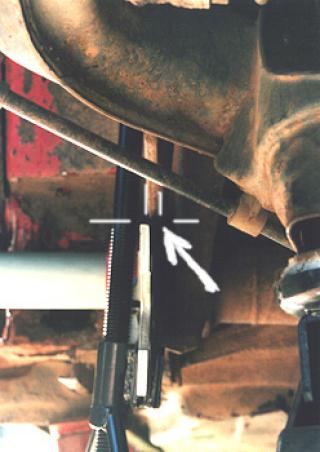
The arrow points to a line that I marked at the top of the stock spring plate with no tension. Remember, the Sway-A-Way (SAW) spring plates are wider, so you have to match them a little above this line.
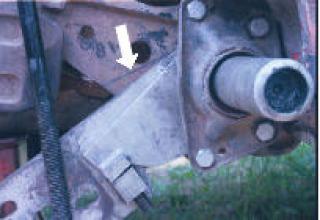
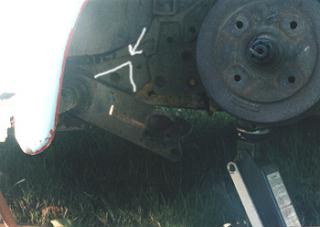
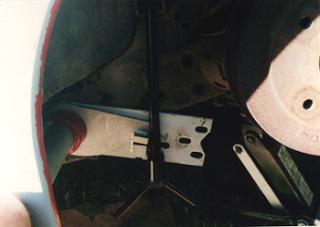
This is a key photo. The arrow points to the spring plate stop. Note that I've cut about a1/2 inch notch in the spring plate. This allows the wider SAW spring plates to go onto the stop with only a minimal fight. See how tight the clearance is at the top of the plate? That big think with 3 holes and two dents is the spring plate mount on the IRS trailing arm. If there is no notch in the spring plate, it is REALLY difficult to get the spring plate behind the trailing arm mount.
The SAW spring plate has plenty of adjustment to max out the axle/CV joint angle on a stock Bug. I set the SAW plate on the torsion bar just as you would with a normal spring plate. I set it for about the right height, and it turns out that I'm not using the adjusting screw at all. I think the adjustment was about 3 splines backward on the inner end of the torsion bar, and then the spring plate set two spline down on the outer end. It took me a few tries to figure this out.
After literally at least 12 hours of removing and reinstalling spring plate, I think I'd recommend an adjustable coil-over shock. The main reason to remove the spring plates may be to just notch them. About 1/4 notch on the bottom of the stock spring plate, so the spring plate gets more travel before it hits the stop is about right. More than this and two bad things happen: 1) You'll go over 12 degrees angle on the axles and trash your CV joints. 2) Even on the IRS you'll have too much camber.
This photo is the stock setup, before disassembly.
Spring plate tool in place, spring plate unbolted, trailing arm raised full up.
Spring plate off stop, marked with a black line.
CB Performance says these two items are interchangeable, and never returns calls or email. The bolt pattern doesn't match. My VW is a 1973.
A template for the stock bolt pattern. I drilled a new lower front hole.
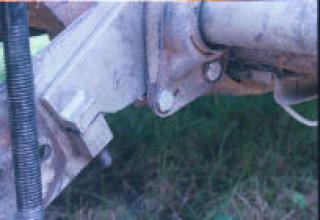
Hmmm. Note that spring plate is to the left of the IRS mounting flange. The instructions from Sway-A-Way didn't mention this little problem. Yes, the spring plate is fully against the lower stop. You just have to pry the holy #*&#%%# out of it. Yes, it bends when you pry on it, but it springs back.
Side view of the above situation. Note that the trailing arm is all the way up, and held there by the jack.
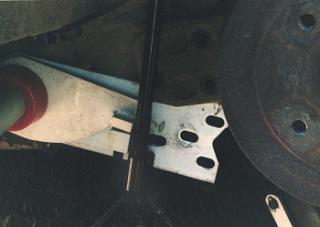
A little closer view with the spring plate behind the IRS trailing arm mounting flange. The spring plate is not yet above the lower stop. At this point the spring plate is kind of bending, and has to be forced upwards.
 Spring plates are difficult. I've put the most recent photos first, and the whole, long sequence after these. I would not recommend Sway-A-Way adjustable spring plates for a normal Baja, especially with an IRS rear. Notching the spring plates is useful, even for an otherwise stock Baja rear. With stock spring plates, only notch 1/4 inch!