Glueing outdoor carpet inside the roof. This is a quick way to get a nice finish inside the car, without the expense or hassle of a new headliner. It absorbs some sound, though glueing in a heavy layer of some padding before glueing in the carpet would have been good. Wear gloves when spreading the mastic. Even though it says "soap and water cleanup", it means that before it comes in contact with air. This stuff was pretty tricky to clean off anything after 5 minutes.
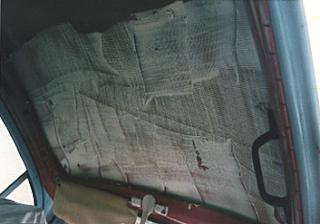
Here is a shot of the front of the passenger compartment with the mastic in place. This is a low VOC product for outdoor carpet from Lowes. Worked well. Let it set up longer than usual - maybe 15 minutes. This is really a two person job. Before the mastic, cut and fit the carpet so it extents behind the headliner rails. Make sure you mark the front.
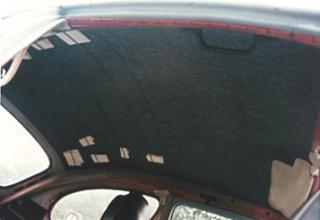
With the mastic a bit tacky, carefully put the carpet in, slipping it neatly behind the headliner rails so you can't see the edges of the carpet. Smooth it down starting in the middle. At this point hopefully it will stick in place. If you want to be sure, put in some of the hoops from the old head liner (you saved those, right?). Stuff some shims between the hoops and the carpet to hold it up. The photo below is of the carpet in the rear of the roof being helped by the hoops and some shims of folded foam-core. This was a pretty easy job.
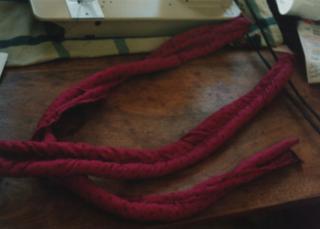
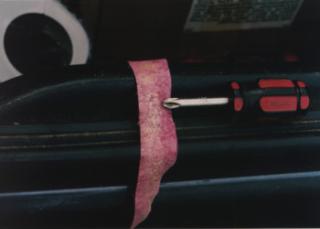
Now, what about that gap between the roof and the headliner rails (or what ever you call that part just under the roof). I filled mine in with a puffy kind of linear trim pillow. I sewed pillow stuffing into a double tube arrangement shown below. One tube goes behind the rail to hold the affair in place. I'll try to shoot a photo of the result. It looks nice. Coincidently, the violet fabric I chose goes well with the gray carpet.
Some of the sub-pages under Interior/Door Panels above have animations of the interior of the Bug door. There is also an animation of how to remove the trim grommets without destroying anything.
Since I first did these repairs, I have found that Tyvek HomeWrap and Tyvek Construction tape are a quick and very effective repair for leaking vapor barriers. I'll have photos of that repair in the Golf doors soon!
The problem: water runs in when it rains. Maybe you replaced the door seals, or you otherwise confirmed that the water is coming from inside the door. It runs in from around the bottom of the interior door trim panel.
Diagnosis: Plastic sheeting covering the inside of the door, behind the door panel is leaking.
Fix: I replaced the plastic sheet with medium gauge vinyl. Vinyl has to be primed so that the urethane sealant will adhere. Maybe you should do a little test patch before you try to glue this into the door of your car. I used a self etching primer. I think this worked out well. The urethane is thick black window glass stuff in a caulking tube. It's kind of the urethane equivalant of RTV silicon sealant. I've applied this fix to my '89 Golf which has really horrible leaking problems. I took photos this past weekend! (Aug 15, 1998)
Sadly, a tube of Federated brand RTV silicon failed to cure. Very, very irritating. It set up to about the consistency of sticky, greasy cream cheese. It took a while to scrape all that off. I returned it to the store and got my money back, but they left the rest of the tubes on the shelf. Are these guys bozos or what? Moral: test your RTV first. It's a good idea anyway given the adherence problems with vinyl and plastics.
Parts: vinyl (from sewing supply), self etching primer, good Urethane or RTV sealant, duct or masking tape
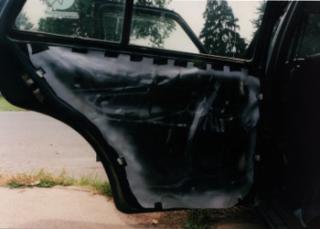
Vinyl, primed, held in place with a duct tape. It was taped in place, and cut to fit perfectly before priming.
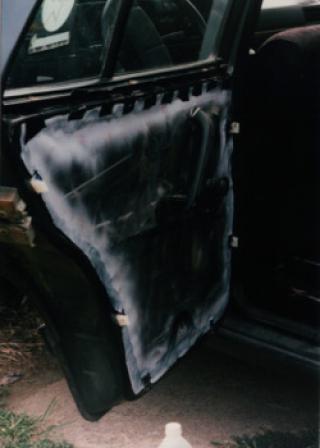
Caulked and pressed down. Do not start pressing in one place and work around - you'll build up a wrinkle. Press in individual spots alternating from one side to the other until all parts are evenly pressed down. Note the width of the seal visible at the rear edge of the vinyl is 1/2 to 3/4 inch (1 cm to 1.5 cm) wide.
I used 3M Trim Adhesive to install a new fabric cover on my Golf headliner. The fabric pictured below was removed a year later from around the sun roof. Already the adhesive is getting brittle and powdery. Not a good sign. That beige stuff is the somewhat crunchy adhesive. I called 3M and they figured that the adhesive has a long life and should be considered permanent. 3M didn't admit to there being any complaints. I'm not complaining, I'm just wondering. My headliner is still in place
 Glueing outdoor carpet inside the roof. This is a quick way to get a nice finish inside the car, without the expense or hassle of a new headliner. It absorbs some sound, though glueing in a heavy layer of some padding before glueing in the carpet would have been good. Wear gloves when spreading the mastic. Even though it says "soap and water cleanup", it means that before it comes in contact with air. This stuff was pretty tricky to clean off anything after 5 minutes.